
Hull Rupture Tier List: Best Modules and Turrets
A pre-release Hull Rupture tier list for modules, turrets, and artifacts, plus an honest answer on the best ship and why the meta is still forming.
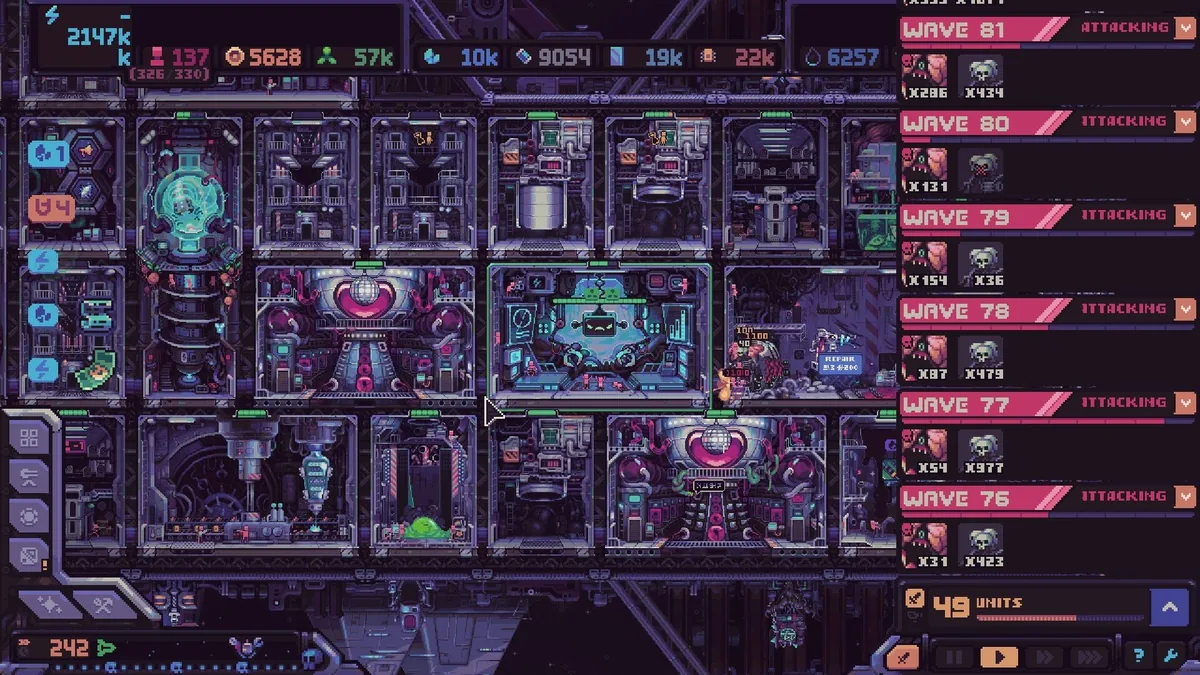
Hull Rupture is not out yet, so any tier list claiming to rank the full game is guessing. What can be ranked is the demo build, using the modules, turrets, and artifacts that Konfa has shown in playable form. That is enough to establish which pieces are foundational and which are situational.
The ranking below uses four criteria: consistency across runs, cost to get online, synergy ceiling, and how badly the run suffers when the item is absent. An S-tier item is one you are happy to see in almost any run. A C-tier item is one you take only when the shop refuses to offer anything else.
"Much of this depends on what the bloodthirsty god of roguelike randomness decides to give you, but no run is doomed by bad luck alone."
— Official source: Hull Rupture Devlog #2
For the systems behind the rankings, read modules and defense.
The full game adds turrets, modules, and modifiers that are not in the demo. Treat the tiers as a starting point, not a launch-day verdict.
The tier list
| Tier | Item | Type | Why it ranks here |
|---|---|---|---|
| S | Reproducer | Module | The only confirmed population growth; every economy depends on it |
| S | Energy Generator | Module | Powers production, repairs, and construction |
| S | Despot's Chamber | System | Free module kits and adjacency buffs compound over a run |
| S | Long-range turret | Turret | Damage before the alien reaches the hull; best boss-lane tool |
| A | Mineral Generator | Module | Gates construction; cheap to staff and cluster |
| A | Beam turret | Turret | Strong with Fragility builds; needs a clear line |
| A | Repair module | Module | Converts energy into uptime; placement decides its value |
| A | Bioreactor | Module | Excellent with a population surplus, fatal without one |
| B | Short-range turret | Turret | Strong at the airlock, useless on an open flank |
| B | Rocket turret | Turret | Good burst into clumps; slow reload |
| B | Rat Turret | Turret | Single-target control with a comedy animation |
| B | Mystic Goo Generator | Module | Enables conditional recipes; depends on the run |
| C | Duplicate production | Module | Fine when staffed, a trap when the ship is already power-starved |
The order is not a shopping list. A B-tier turret in the right gap can outperform an S-tier turret with no line of sight. The tier list describes the item's average value, not its value in your specific layout.
Why the Reproducer is S-tier
Every other system in Hull Rupture consumes humans. The Reproducer is the only confirmed way to make more of them. Without it, a run is a countdown: every event, wave, and Bioreactor use reduces a fixed population.
The Reproducer also compounds. A Reproducer built at wave 3 produces workers for 17 more waves; one built at wave 15 produces for five. That timing advantage is why it ranks above every production module except the generator.
Its weakness is that it does nothing immediately. If the ship is already in a population crisis, the Reproducer is the recovery tool, not the cause. Build it before the crisis.
Why the Chamber is S-tier
The Despot's Chamber is easy to undervalue because its output is random. It produces free module kits slowly, scaled by the humans assigned to it, and it buffs adjacent modules.
Random kits sound unreliable. In practice, a free kit is a saved shop purchase and a saved slot decision. Over a 20-wave run, the Chamber's output can be worth several crates, and the adjacency bonus makes your best production rooms better every wave.
The Chamber is not a reason to build wide. It rewards a compact cluster where its aura hits rooms you actually staff. A Chamber surrounded by empty slots is a wasted S-tier.
Turret rankings
Long-range turrets are the safest investment because they deal damage before the alien reaches the hull. They are also the best answer to bosses, which land far from the airlock and force you to fight on the outer surface.
Beam turrets move up sharply if you find the Reproducer's Eyes modifier, which makes every Beam apply Fragility. Without that modifier they are solid but not exceptional. With it, they become a damage engine.
Short-range turrets are the opposite: cheap, powerful, and completely dependent on a chokepoint. Put one beside the airlock and it earns its slot. Put one on an open corner and it fires at nothing.
Rocket turrets are the best wave-clear option shown so far, but the slow reload makes them vulnerable to fast waves. Pair them with a short-range turret that covers the reload window.
The Rat Turret is a control tool, not a damage tool. It turns one target into a rat, which is excellent against a boss or a big alien and irrelevant against a swarm. It is a B-tier pick with an A-tier moment.
Best ship: the honest answer
There are three ships in the full game and only one has been playable: Izumo, the small, maneuverable hull made from scavenged parts. The other two are designed around different playstyles, including one that supports a low-mass, high-speed route through many galaxy nodes.
That makes a "best ship" ranking premature. What can be said:
| Ship | Status | Likely best for |
|---|---|---|
| Izumo | Playable in demo | Fast, flexible runs; learning the economy |
| Low-mass ship | Announced, unnamed | Galaxy-heavy routes, many events, fewer fights |
| Third ship | Announced, unnamed | Unknown; likely a heavier or defense-focused hull |
Izumo's description emphasizes speed and maneuverability. In practice, its small starting hull means fewer module slots and a shorter repair path. It rewards compact production and punishes overbuilding, which makes it a good teacher.
The low-mass ship is the one to watch for galaxy-map players. Travel speed depends on engines and total mass, so a ship designed to stay light can visit more nodes and take more events. That is a different economy, not necessarily a stronger one.
Artifacts worth building around
The full artifact list is not public. Three confirmed effects are enough to show how builds form:
- Reproducer's Eyes: all Beam turrets apply Fragility. This is the centerpiece of a Beam build.
- Cheat Code: was nerfed in the September patch. It is no longer the automatic pick it once was.
- Mushroom modifier: conditional resource generation tied to Mystic Goo stock. It rewards a production chain you might otherwise ignore.
The pattern is that artifacts are build-around, not flat upgrades. A tier list of artifacts without the build context is meaningless. Take the artifact that makes your existing ship better, not the one with the highest rarity color.
How to use a tier list in a roguelite
A tier list answers "what is generally good," not "what should I buy now." Three questions beat any ranking:
- What does my ship lack? A generator when the bar is empty, a turret when the airlock is exposed, a Reproducer when the population is falling.
- What can I staff? An S-tier module with no workers is a C-tier room.
- What does the next wave demand? A boss lane needs long-range fire; a swarm needs splash and a chokepoint.
The developers' own framing is that no run is doomed by bad luck. The shop can refuse to offer the item you want, but the layout, staffing, and turret placement are still yours. A tier list is a tiebreaker, not a strategy.
Sources and further reading
Related
FAQ
Is this tier list for the full game? No. It ranks the demo build and confirmed systems. The full release adds two ships, four modes, and more modules, which will change the rankings.
What is the best ship in Hull Rupture? Unknown. Only Izumo is playable. The low-mass ship is the most promising for galaxy-heavy runs, but it has not been shown in detail.
What is the best turret? Long-range turrets are the safest general pick. Beam turrets become the best with the Reproducer's Eyes modifier.
Are artifacts ranked? Only three confirmed effects are discussed. A full artifact tier list needs the release build.
Will the tier list be updated after launch? Yes. The launch build will add content and change balance, and the rankings will be revised with it.
More Hull Rupture Guides
How Hull Rupture's hull construction works: the 15-block deck, placement rules, stilt corridors, costs, and layouts that survive late waves.
Hull Rupture treats humans as a resource. Learn where to assign them, when to convert them in the Bioreactor, and how to avoid a population death spiral.
How Hull Rupture modifiers and artifacts work: shop vs event pools, confirmed effects, conditional bonuses, and which builds are worth committing to.
Hull Rupture module guide: confirmed production rooms, adjacency bonuses, module kits, selling duplicates, and placement rules for a stable ship.
Hull Rupture launches on PC, Mac, and Linux on November 4, 2026. There is no PS5, Xbox, Switch, or mobile version. Here is the full platform status.
How Hull Rupture's energy economy works: generator staffing, module upkeep, brownout recovery, and when to stop building before the ship stalls.
Hull Rupture has no full reviews yet. Here is what the April preview build praised, what it criticized, and how the demo's reception frames the launch.
Hull Rupture releases November 4, 2026 on PC, Mac, and Linux. Here is what Steam has confirmed about the price, launch time, demo, and day-one content.